Monday, April 12, 2010

Real Life Science Experiment

Fighting Ice
Materials Needed Part 1: Bowls, Ice, Pepper, Gain, Splenda, Salt, Something to label bowls and content, Suavitel( fabric softener), timer
Step 1: Set out bowls and label each bowl with the following titles: ICE ONLY, ICE + SALT, ICE+ PEPPER, ICE+ SPLENDA, ICE+GAIN, ICE + SUAVITEL
Step 2: Measure out a tablespoon of each of the following items: Salt,Pepper, Gain, Suavitel, and Splenda
Step 3: Place 2 ice cubes in each bowl.
Step 4: Sprinkle the different products on each ice cube in the corresponding bowls.
Step 5: Record the time.
Step 6: Observe often and record your findings!
Here's what I discovered:
Real Life Science Experiment
PART 2 Salt Water vs. Pure Water
Materials Needed: Ice tray, water, salt, tabelspoon, freezer
Step 1: Fill the ice tray up with water.
Step 2: Mark top row and bottom row( I used stickers to differentiate between the two).
Step 3: In one of the rows, place half a tablespoon of salt into each compartment of water.
Step 4: Place tray into freezer and observe.
Step 5: Check often to see which one freezes first!
What I found:
After the tray had been in the freezer for 1 hour, I checked the progress. It appeared as if the salt water was unchanged, and the pure water was starting to form a solid layer on top.
After two hours, the water that contained no salt was completely frozen; the water that contained salt was just starting to form a solid layer.
After 3 hours in the freezer, the water containing ice was completely frozen.
It took 3 times longer to freeze salt water than it did to freeze pure water!

Wednesday, March 10, 2010

Reaction Time

Check Your Reaction Time
Page 73
By: Allie and Kayla W.
Tennessee State Stadard GLE 0707.1.3
Describe the function of different organ systems and how collectively they enable complex multicellular organisims to survive.
SPI 0707.1.3- Explain the basic functions of a major organ system.
You need all of your senses to tell you when you need to react suddenly and quickly.
Take this test to find out just how quick you are!
Materials Needed: Scissors, pencil, white paper, glue or tape, markers or crayons,ruler

Step 1: Place the ruler on the paper and trace around it.


Step 2: Cut out the strip, and divide it into six equal parts.


Step 3: Color each section of the paper strip a different color. Label the bottom strip fast and the top strip slow.


Last Step: Tape or glue the paper strip to the ruler, and let the fun begin!!
What to do: Have a friend hold the top of the ruler. Place your hand at the bottom with fingers slightly open. When your friend releases the ruler, see how fast you can catch it!

I have a slow reaction time. :(


My niece, Chloe, has no reaction time. It's harder than it looks! :)~

What exactly is our senses? Our senses are the physical means by which all living things see, hear, smell, taste, and touch.Each sense collects information about the world and detects changes within or without the body. We use all of our senses every day whether we realize it or not. Good observers use all of their senses. Observing your surroundings is a very important scientific skill as it helps you to be more aware of your surroundings and more accurate about what you are observing.
Q: Which sense do you use mainly in this experiment?
A: Sight! The sense of sight sends nerve signals to the brain when it sees the ruler being dropped. Signals are then sent back out to the muscles in the arm and hand to catch the ruler.
Why does this happen? All senses, including sight, depend on the working nervous system. Our sense organs start to work when something stimulates special nerve cells in sense organs called receptors.We have five main sense organs : the eyes, nose, ears, skin, and tongue. Once stimulated, the nerve receptors send impulses along sensory nerves to the brain.Your brain tells you what the stimulus is, and then sends signals out to our motion system telling us how to react to the stimulus.
This lesson could be used in the classroom to meet both science and math standards. In science, it would be a great way of introducing the senses and talking about them, particularly the sense of sight. After the senses have been discussed, you could teach how the brain sends signals to your body making each sense work. In older grades, you could teach about the nervous system and the brain and how they work together. In math, you could have students graph their reactions times based on which color they grabbed when testing their reaction time. Older students could time how long it took them to catch the ruler using a stopwatch, and then find the mean, median, mode, and range of the data. They could also use the data to compare their reactions times to that of other students' reaction times.
Some Neat Sense experiments:

Thursday, February 25, 2010

Make Something Sink, Then Float (page 17)
Materials Needed: Bowl of Water, Marbles, Modeling Clay
Tennesee Science Standard: GLE 0107.9.1- Classify solids according to their size, shape, color, texture, hardness, ability to change shape, magnetic attraction, whether they sink or float, and use.
Step1: Drop some marbles into the bowl of water.
They sink!

Step 2: Roll the clay into a ball, and drop it into the water.
It sinks also!
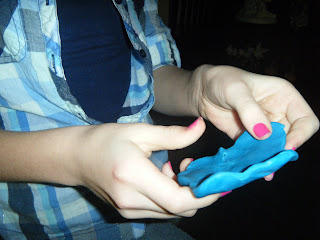
Step 3: Make a "boat" out of the same ball of clay you dropped into the water.
Step 4: Place the boat in the water. It floats!
Step 5: Place some marbles in the boat.
The boat and marbles are both floating now!
We made objects sink, and then made the same objects float even though they weighed the same as before.

How does this work?

Whether something sinks or floats has nothing to do with how much an object weighs. We didn't change the weight of the obects; we changed the shape. An object floats or sinks based upon how much water is displaced, or "pushed aside." The "boat" made out of clay was bigger than the ball of clay and displaced, or pushed aside, more water causing it to float. The marbles couldn't float because they were small and couldn't push enough water out of the way to equal the same weight. So, it is important to remember that anything that floats weighs the same as the water pushed out of the way. There is another factor that determines whether an object sinks or floats. Density also plays an important part.
What is density? Density is a measure of mass per unit of volume
Density = mass/ volume

What is volume?

Volume, also called capacity, is a quantification of how much space an object occupies.
The density of an object depends upon its weight and size(or voulme).If two solid objects are different sizes, but weigh the same, the smaller object is more dense because it is more compacted.
If an objects floats on water, then it is less dense than the water itself. If it sinks, then it is morse dense than water.
Here's a look at density: http://www.nyu.edu/pages/mathmol/textbook/density.html

These very principles are also used in shipmaking and boat making. Even though some boats are huge, they still float. This is because they are metal shells that are filled with air. They are less dense and lighter than the water they push aside, or displace, and this allows the boat to float.


I think this would be a great experiment to use in the classroom. I think everyone wants to know just how a boat can float when it is so big. I know when I was a child it amazed me to see such big ships floating on the water. It even amazed me that I could float in the swimming pool. :) This experiment could be used to teach about density, water displacement, and volume. Students could also have fun with the experiment by seeing who could make their boat hold the most marbles.


Here is a website that calculates density for us: http://www.1728.com/density.htm


Thursday, February 4, 2010

How to see a sunset part 3

After conducting the experiment, Megan and I learned that the sun appears oranges when it is setting because of the particles in the air. Here is a website that explains it: http://scifun.chem.wisc.edu/HOMEEXPTS/BlueSky.html

How to see a sunset part 2

In this video, Megan demonstrates what the sun looks like when it is high in the sky, and then what it looks like as it is setting. As the sun sets, it often gives off a red or orange color. Here is a site that gives some interesting facts about the sun: http://library.thinkquest.org/J002231F/Sun/factsaboutthesun.htm

Wednesday, February 3, 2010

How to see a sunset part 1

Me and Megan done an experiment that shows what it looks like when the sun is setting. We done the experiment in three parts, this one being the first. Before we started our experiment, we asked ourselves the question, "What makes a sunset appear orange or red?" We came up with the hypothesis that the sun appears orange when it is setting because it is closer to the earth, and the earth is bouncing the sun's rays off giving it an orange color. Watch to see if we are right!

All three parts of "See a Sunset" refers to Tennesee State Standard GLe 0207.6.1- Realize that the sun's position in the sky appears to change. Sunsets could be discussed when talking about the sun and how it appears to change positions in the sky.